Install Ubuntu Server and Samba on the ODROID-HC1
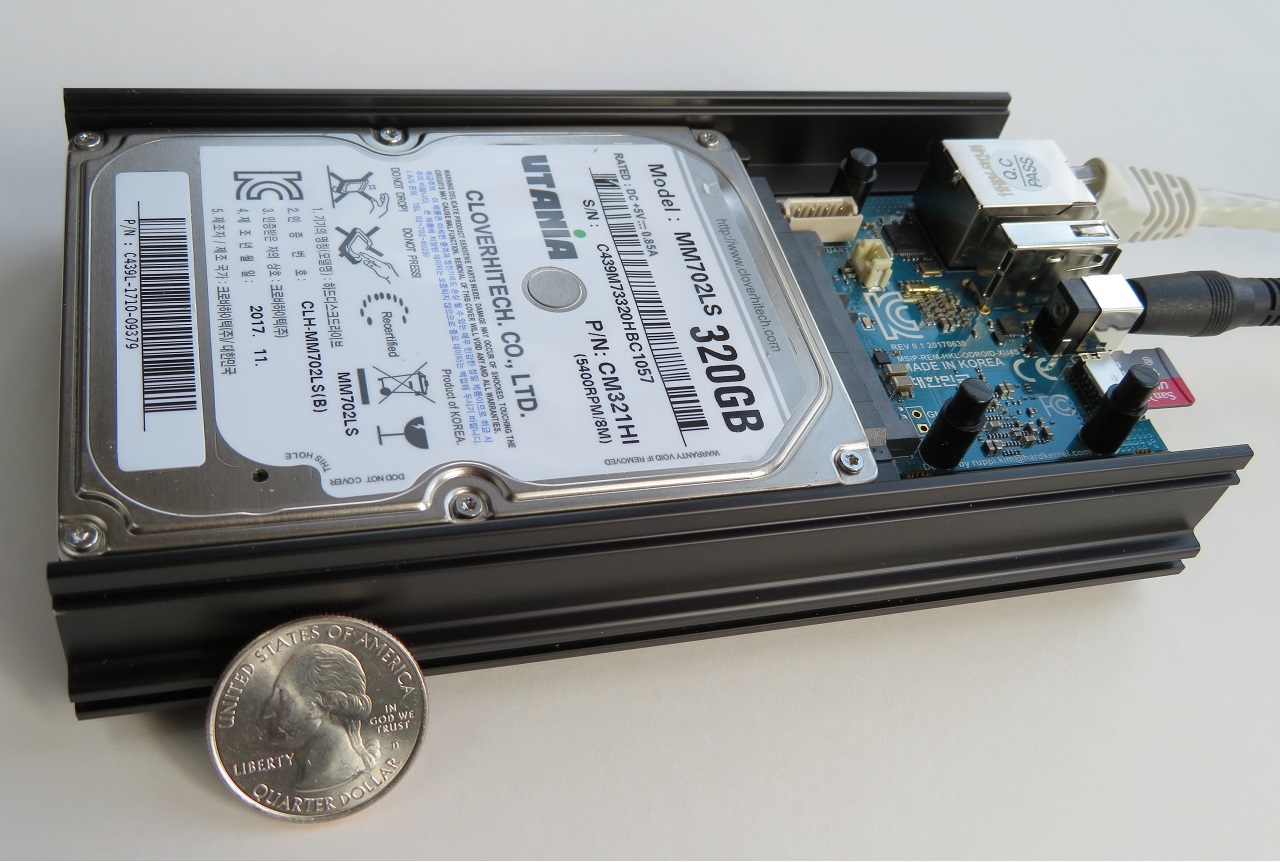
The ODROID-HC1 is a simplified version of the ODROID-XU4 single-board computer that has been designed for use as a small headless server. It includes a built-in SATA connector and comes mounted in a stackable aluminum frame that acts both as a heat sink for the CPU and as a mount point for a 2.5" hard drive or SSD.
Software options include Android, Ubuntu, Armbian, Open Media Vault (OMV) and several others, but I used the minimal build of Ubuntu Server 18.04. Armbian probably makes system configuration easier, and OMV provides a full NAS solution, but I stopped looking after installing Ubuntu Server because it was simple to set up and did exactly what I needed.
Installation
-
Download the latest Ubuntu 18.04 (MINIMAL, BARE OS) image from the ODROID Ubuntu Kernel 4.14 repository and burn it to a microSD card using Etcher.

-
Install the microSD card in the device with the pins down and label up, then plug in the LAN cable followed by the power cable. The red, green and blue LEDs should all light up as the machine boots, and then the blue LED should flash as the OS loads. According to the XU4 manual, there may be something wrong with the SD card or the image itself if the blue LED doesn’t flash. Make sure the card is properly seated and reburn the image or switch cards if necessary.
-
The release notes indicate that the first cold boot might take more than 5 minutes, depending on the microSD card and installed OS. After a few minutes, run ipscan or check the DHCP reservations list on the router to find the IP address that has been assigned to the ODROID device. In my case, the router assigned 192.168.0.110.
-
Eventually, it should be possible to SSH into the IP assigned to the device as the root user (ssh root@IP) with the default password (odroid). Depending on the network setup, it might also be possible to use the device name (odroid) instead of the IP address.
λ ssh root@odroid
[...]
λ ssh root@192.168.0.110 The authenticity of host '192.168.0.110 (192.168.0.110)' can't be established. ECDSA key fingerprint is SHA256:UAop+TyiXAVFgOlJMkLqiLzjLNYlFrOMgf03RMj0vKw. Are you sure you want to continue connecting (yes/no)? yes Warning: Permanently added '192.168.0.110' (ECDSA) to the list of known hosts. root@192.168.0.110's password: Welcome to Ubuntu 18.04.1 LTS (GNU/Linux 4.14.85-152 armv7l) * Documentation: https://help.ubuntu.com * Management: https://landscape.canonical.com * Support: https://ubuntu.com/advantage The programs included with the Ubuntu system are free software; the exact distribution terms for each program are described in the individual files in /usr/share/doc/*/copyright. Ubuntu comes with ABSOLUTELY NO WARRANTY, to the extent permitted by applicable law. -
Update the system.
root@odroid:~# apt update
[...]

root@odroid:~# apt -y full-upgrade
[...]
Create a regular user
-
To avoid using the root user, create a regular user and add it to the sudo group.
root@odroid:~# adduser ccammack Adding user `ccammack' ... Adding new group `ccammack' (1000) ... Adding new user `ccammack' (1000) with group `ccammack' ... Creating home directory `/home/ccammack' ... Copying files from `/etc/skel' ... Enter new UNIX password: Retype new UNIX password: passwd: password updated successfully Changing the user information for ccammack Enter the new value, or press ENTER for the default Full Name []: Room Number []: Work Phone []: Home Phone []: Other []: Is the information correct? [Y/n] y root@odroid:~# usermod -aG sudo ccammack -
Switch to the new user and make sure it can use sudo.
root@odroid:~# su - ccammack To run a command as administrator (user "root"), use "sudo <command>". See "man sudo_root" for details. ccammack@odroid:~$ ls -a /root ls: cannot open directory '/root': Permission denied ccammack@odroid:~$ sudo ls -a /root [sudo] password for ccammack: . .. .bash_history .bashrc .cache .gnupg .local .profile .wget-hsts -
Exit the regular user, lock the root account and log out.
ccammack@odroid:~$ exit logout root@odroid:~# passwd -dl root passwd: password expiry information changed. root@odroid:~# exit logout Connection to 192.168.0.110 closed. -
Log back in again as the regular user.
λ ssh ccammack@192.168.0.110
ccammack@192.168.0.110's password:
Welcome to Ubuntu 18.04.1 LTS (GNU/Linux 4.14.94-155 armv7l)

 * Documentation:  https://help.ubuntu.com
 * Management:     https://landscape.canonical.com
 * Support:        https://ubuntu.com/advantage

Last login: Sat Feb  2 10:14:13 2019 from 192.168.0.103
Assign a static IP to the device (optional)
-
This step is not required for most situations, but I needed it for my application. Select an unused local IP address (192.168.0.254) and use the
ipcommand to find the name of the ethernet device (eth0).ccammack@odroid:~$ sudo ip a [sudo] password for ccammack: 1: lo: <LOOPBACK,UP,LOWER_UP> mtu 65536 qdisc noqueue state UNKNOWN group default qlen 1000 link/loopback 00:00:00:00:00:00 brd 00:00:00:00:00:00 inet 127.0.0.1/8 scope host lo valid_lft forever preferred_lft forever inet6 ::1/128 scope host valid_lft forever preferred_lft forever 2: eth0: <BROADCAST,MULTICAST,UP,LOWER_UP> mtu 1500 qdisc fq_codel state UP group default qlen 1000 link/ether 00:1e:06:32:61:96 brd ff:ff:ff:ff:ff:ff inet 192.168.0.110/24 brd 192.168.0.255 scope global dynamic noprefixroute eth0 valid_lft 3068935748sec preferred_lft 3068935748sec inet6 fe80::7285:ef8e:8d70:92bc/64 scope link noprefixroute valid_lft forever preferred_lft forever -
The default netplan configuration file for Ubuntu Server 18.04 is /etc/netplan/01-netcfg.yaml. Edit the file and enter these settings for eth0:
For example, usingnetwork: version: 2 renderer: networkd ethernets: eth0: dhcp4: no dhcp6: no addresses: [192.168.0.254/24] gateway4: 192.168.0.1 nameservers: addresses: [9.9.9.9,192.168.0.1]nanoto edit the configuration file looks like this. When finished, pressCtrl-Sto save andCtrl-Xto exit.ccammack@odroid:~$ sudo nano /etc/netplan/01-netcfg.yaml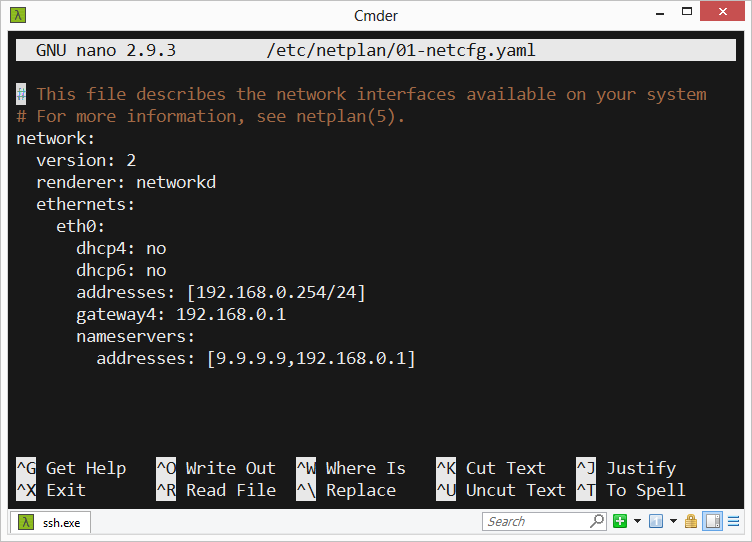
-
Apply the network configuration changes using
netplan, which will hang for several seconds and then reset the connection. Log back in again using the new static IP address.ccammack@odroid:~$ sudo netplan apply Connection reset by 192.168.0.110 port 22 λ ssh ccammack@192.168.0.254 The authenticity of host '192.168.0.254 (192.168.0.254)' can't be established. ECDSA key fingerprint is SHA256:UAop+TyiXAVFgOlJMkLqiLzjLNYlFrOMgf03RMj0vKw. Are you sure you want to continue connecting (yes/no)? yes Warning: Permanently added '192.168.0.254' (ECDSA) to the list of known hosts. ccammack@192.168.0.254's password: Welcome to Ubuntu 18.04.1 LTS (GNU/Linux 4.14.94-155 armv7l) * Documentation: https://help.ubuntu.com * Management: https://landscape.canonical.com * Support: https://ubuntu.com/advantage Last login: Sun Feb 3 03:14:56 2019 from 192.168.0.103
Partition and format the SATA drive
-
Find the name of the SATA drive (/dev/sda) using
fdisk -l.ccammack@odroid:~$ sudo fdisk -l [...] Disk /dev/sda: 298.1 GiB, 320072933376 bytes, 625142448 sectors Units: sectors of 1 * 512 = 512 bytes Sector size (logical/physical): 512 bytes / 4096 bytes I/O size (minimum/optimal): 4096 bytes / 33553920 bytes Disklabel type: dos Disk identifier: 0xdca13c75 -
Run fdisk on that drive and use the
dcommand a few times to delete any existing partitions.ccammack@odroid:~$ sudo fdisk /dev/sda Welcome to fdisk (util-linux 2.31.1). Changes will remain in memory only, until you decide to write them. Be careful before using the write command. Command (m for help): d Selected partition 1 Partition 1 has been deleted. Command (m for help): d No partition is defined yet! Could not delete partition 4846342 -
Use the
nandpcommands to create a new primary partition with default settings and allow fdisk to clean up old drive artifacts if it finds any.Command (m for help): n Partition type p primary (0 primary, 0 extended, 4 free) e extended (container for logical partitions) Select (default p): p Partition number (1-4, default 1): First sector (2048-625142447, default 2048): Last sector, +sectors or +size{K,M,G,T,P} (2048-625142447, default 625142447): Created a new partition 1 of type 'Linux' and of size 298.1 GiB. Partition #1 contains a ext4 signature. Do you want to remove the signature? [Y]es/[N]o: y The signature will be removed by a write command. -
Make sure the new partition’s type is set to 83 (Linux).
Command (m for help): t Selected partition 1 Hex code (type L to list all codes): 83 Changed type of partition 'Linux' to 'Linux'. -
Write the new partition with
w.Command (m for help): w The partition table has been altered. Calling ioctl() to re-read partition table. Syncing disks. -
Run
fdisk -lagain and note that /dev/sda now contains a new Linux partitition called /dev/sda1.ccammack@odroid:~$ sudo fdisk -l /dev/sda Disk /dev/sda: 298.1 GiB, 320072933376 bytes, 625142448 sectors Units: sectors of 1 * 512 = 512 bytes Sector size (logical/physical): 512 bytes / 4096 bytes I/O size (minimum/optimal): 4096 bytes / 33553920 bytes Disklabel type: dos Disk identifier: 0xdca13c75 Device Boot Start End Sectors Size Id Type /dev/sda1 2048 625142447 625140400 298.1G 83 Linux -
Format the new partition using
mkfs, which may take some time to to finish.ccammack@odroid:~$ sudo mkfs -t ext4 /dev/sda1 mke2fs 1.44.1 (24-Mar-2018) Creating filesystem with 78142550 4k blocks and 19537920 inodes Filesystem UUID: 64f39c2a-d55e-4580-9570-b28df4410e78 Superblock backups stored on blocks: 32768, 98304, 163840, 229376, 294912, 819200, 884736, 1605632, 2654208, 4096000, 7962624, 11239424, 20480000, 23887872, 71663616 Allocating group tables: done Writing inode tables: done Creating journal (262144 blocks): done Writing superblocks and filesystem accounting information: done
Automatically mount the SATA drive at startup
-
Use
blkidto display the partition’sUUIDand copy it for use in the next step.ccammack@odroid:~$ sudo blkid /dev/sda1 /dev/sda1: UUID="64f39c2a-d55e-4580-9570-b28df4410e78" TYPE="ext4" PARTUUID="dca13c75-01" -
Create a mount point for the partition (/media/hdd). Append the partition’s settings to the end of /etc/fstab so that it will be initialized properly when mounted. Use the
mountcommand to mount the partition manually and make sure that it does using thedfcommand. Change the owner of the mount point to the recently added user.ccammack@odroid:~$ sudo mkdir -p /media/hdd ccammack@odroid:~$ echo 'UUID=64f39c2a-d55e-4580-9570-b28df4410e78 /media/hdd ext4 defaults 0 2' | sudo tee --append /etc/fstab > /dev/null ccammack@odroid:~$ sudo mount /dev/sda1 ccammack@odroid:~$ sudo df -h /media/hdd Filesystem Size Used Avail Use% Mounted on /dev/sda1 293G 65M 278G 1% /media/hdd ccammack@odroid:~$ sudo chown -R ccammack:ccammack /media/hdd
Set up Samba to access the drive from other machines
-
Install Samba.
ccammack@odroid:~$ sudo apt -y install samba [...] -
Edit the Samba configuration file (/etc/samba/smb.conf) and add the new mount point and user info to the bottom of the file.
For example, using# odroid sata drive [data] path = /media/hdd valid users = ccammack force group = ccammack create mask = 0660 directory mask = 0771 read only = nonanoto edit the configuration file looks like this. When finished, pressCtrl-Sto save andCtrl-Xto exit.ccammack@odroid:~$ sudo nano /etc/samba/smb.conf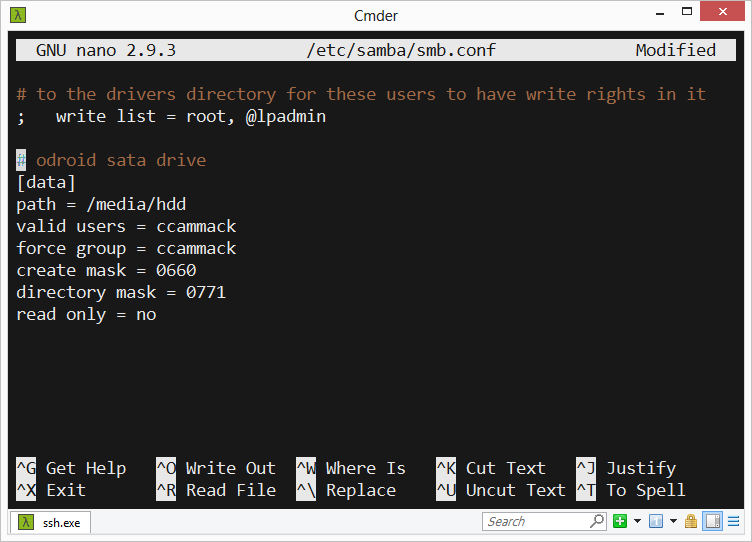
-
Restart the Samba server.
ccammack@odroid:~$ sudo /etc/init.d/smbd restart [ ok ] Restarting smbd (via systemctl): smbd.service. -
Samba uses a different password database than the one used by the system, so run the
smbpasswdcommand to set the Samba password for the user. For my application, I used the same password for both system login and Samba access.ccammack@odroid:~$ sudo smbpasswd -a ccammack New SMB password: Retype new SMB password: Added user ccammack.
Browse the Samba share
-
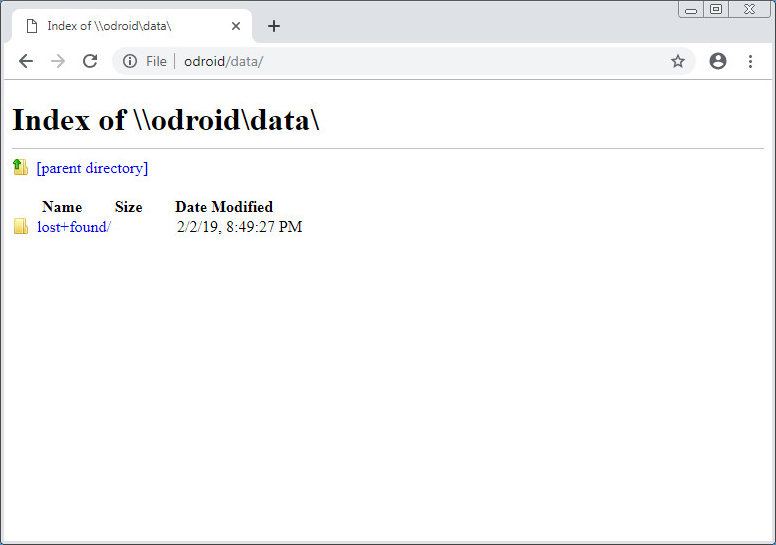
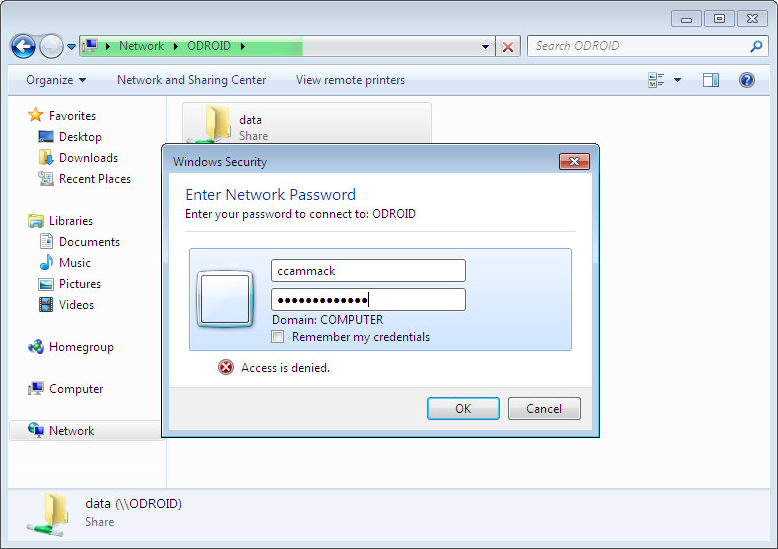
It should now be possible to use the File Explorer to browse the Samba share using the device’s name (\\ODROID\data) or IP address (\\192.168.0.254\data). Enter the user name and Samba password when requested.
-
It should also be possible to use a web browser to access the files using using the device’s name (file://odroid/data/) or IP address (file://192.168.0.254/data/).